Tuesday, December 14, 2010

Setting up your doll bed

Well, the bed has arrived and now what?

First, when Fedex delivered the box you may have thought you were getting a new TV, or maybe a window air conditioner or even a new chandelier. Thankfully, when you opened the box, you found your new doll bed. At least we hope you did! We go "green" whenever we can and we recycle, recycle, recycle! So whatever boxes we can get from family, friends or even enemies, we take, store and use for shipping whenever we can.

The set up of your bed is fairly painless. That is once you get through all the packing materials. Was all that packing material necessary you ask? YES! We want your bed to arrive in good shape! We first wrap the bed in waxed paper to protect the finish. Then in bubble wrap (to protect the waxed paper). Not really. But you understand the concept.

Then, to protect it further, we use as much packing material around the bed as we can. We do understand that not all our packing is considered "green" but we do what we can. Of utmost importance to us is that your bed arrives unbroken and in good condition.

In the box you will find a smaller box, actually a photo storage box, with the name of the bedding in the name plate on one end of the box. Inside that small box is all the bedding required to complete the bed.

Now to the setup.

1) Open the box from the top. Under some of the packing material you will find 2 ziplock plastic bags. One will contain large screws. They are to be used to attach the side rails to the headboard and footboard. The other bag contains the small appliques that will cover the screws on the footboard and the screws needed to attached them to the bed.

2) Carefully unwrap all items. If you are using a knife to cut through the tape and packing material, please be careful that you do not scratch the finish on the bed.

3) The side rails will have a strip of wood on the inside. That is where the bunky board will sit. Under that strip of wood is a velcro strip that will be used to attach the dust ruffle.

4) Using the large screws provided and a phillips head screwdriver, align the screw holes in the headboard to the pilot holes in the footboard and attach, making sure that the side rail with the wood and velcro strip is to the inside of the bed. The rails are not interchangeable. Make sure, by lining up the screw holes that you have the correct rail on the correct side of the bed.

5) In the same manner, attach the footboard to the side rails with the rest of the large screws.

6) Using the small screws, attach the small appliques to the footboard, lining them up so they cover the two screw holes used to attach the footboard to the side rails.
7) Once the bed is assembled, attach the dust ruffle. There are 3 dust ruffles, with velcro on the top of each. The two long ones are for the sides and the short one for the footboard. Attach them to the velcro strip on the rails and footboard.

8) Once the bed is assembled, and the dust ruffles attached, lay the bunky board in the bed, so it rests on the wooden strips.
9) Next, put the mattress on top of the bunky board.
10) The rest is pretty self explanatory. Put on the sheet, tucking it under at the foot and on the sides of the bed.

11) Next, place the comforter on the bed, also tucking it under at the foot and on the sides, much like wrapping a box.

12) Lay the coverlet over the comforter where the bottom edge will just come to the end of the bed. Turn it back so the reverse side can be seen.

13) Place the pillow, bolster pillow and accent pillow at the head of the bed.

14) Voila! Completed doll bed!
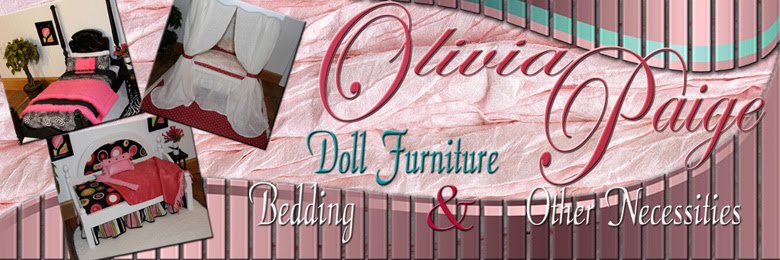

 We, at Olivia Paige, hope you enjoy your bed as much as we enjoyed making it for you!

Saturday, December 4, 2010

MMP Ornament Swap 2010

Well, I'm late as usual! Been really busy... I know that is not a good excuse. But here I am, finally posting the ornaments I received in the Make Mine Pink ornament swap.

First, my ornament from Mary at Mary's Cottage Treasures. Have you ever seen a cuter angel? I think not.
She is just adorable and she has my name. What a coincidence!!


Next is a very unique and creative ornament made from an antique oil spout. The santa, tinsel and ornaments are also vintage. This came from Meri at Imagimeris. I doubt she really knows how well this fits in this old house.

Now to the ones I sent out. And yes I realize that mine are not very creative. I did learn through all this that this may not be my forte. I believe I have a better understanding of the process now and if I could do it all over again... but I can't. So here they are.

This first one was to Mary. It's kind of hard to see but the top of the ornament is an angel. Mary likes angels.
Next, the green one to Meri.
This one to Joanne. I know it looks as though it is red and purple, but it is really red and blue.


Tuesday, November 9, 2010

Soft Sugar Cookies for Heather

This is an easy sugar cookie recipe, you don't have to roll it out, and the cookies are soft and chewy, unlike other sugar cookies. Anybody can make these."

Original recipe yield 4 1/2 dozen

•2/3 cup shortening
•2/3 cup butter
•1 1/2 cups white sugar
•2 eggs
•2 teaspoons vanilla extract
•3 1/2 cups all-purpose flour
•2 teaspoons baking powder
•1 teaspoon salt
•1/3 cup granulated sugar for decoration

Preheat oven to 350 degrees F (175 degrees C). In a medium bowl, cream together the butter, shortening and sugar. Stir in the eggs and vanilla. Combine the flour, baking powder and salt, stir into the creamed mixture until dough comes together. Roll dough into walnut sized balls and roll the balls in sugar. Place them on an unprepared cookie sheet about 2 inches apart. Bake cookies 10 to 12 minutes in the preheated oven, until bottom is light brown. Remove from baking sheets to cool on wire racks.

Wednesday, October 13, 2010

Make Mine Pink Ornament Swap!


Won't you join us? Make Mine Pink is having a Ornament Swap and a Blog Hop, too. We are inviting friends far and wide to join the fun. You may invite your friends, too. Here are the details:

1)You will need to fill out the short questionnaire ~here~ to sign up for the swap. . Sign-ups for this swap will be held until 10/21(ending at 11PM EST)The swap list will computer generated on 10/22(no late entries allowed)Your three swap partners' profiles will be emailed to you the afternoon of 10/22.

2) Share the badge at the right (click, to copy and save) on your blog as soon as possible. Please link to this post. Spread the word, invite your friends, because everyone is invited but we will limit it to 99 participants

3)You will have 4 weeks to create your ornaments. Please plan on having them in the mail to your partners by 11/19.

4)On the day of the Ornament Swap Party, 11/29, please post pictures of the ornaments you have received on your blog. Then come over to the Make Mine Pink blog and post your link. We will be using a thumbnail linking tool , so have your post ready.

5) Grab a cup of tea or coffee and blog hop with the other Swappers on the day of the Swap Party.

One more rule: All ornaments must be handmade. Please create something you would love to receive in return. That way we will all receive something wonderful~ the joy will be in both the giving and the receiving.No dollar amount will be set, create what you would love to receive.

Disclaimer: Because not all the participants are members of Make Mine Pink, MakeMinePink.com can not be held responsible for shipping dates, ornament quality, and participation compliance.

Please note: While we would love to have everyone join, if you feel you cannot adhere to the rules as stated or the ship dates, please do not join this swap. We will have other swaps that you may feel more comfortable joining. Thank You for your consideration.

HAVE FUN CREATING!

Thursday, August 12, 2010

Problem... Solution

Problem
Remodeling is or can be a test of your creativity. The room where the breakfast nook is now, was the back porch. It is on the west side of the house so we intended to put up two ceiling fans. As happens regularly around here, we changed our minds and decided to extend the house to include that space. However, we now had two holes in the ceiling and neither of them in the right place for a light fixture. (The middle hole was cut for the light fixture.)
Photobucket
I could have purchased a couple of ceiling medallions and covered the holes, but thought that would look a little strange. I mean, what would people think? That I was trying to cover some holes? Maybe. (Not that I truly care what people think.)

So... remembering back. When we started remodeling 3 years ago we found newspapers dated from 1968, the year Chester and I graduated high school. They had been used for insulation behind some old paneling. I had put them in a plastic bag and stored them, thinking that someday they might come in handy. (Strange, weird, coincidence: The day I was putting this all together, Chester was looking over the newspapers and miscellaneous stuff I had laid out on my craft table. He asked if I had noticed the date on the newspapers. I hadn't. All I remembered was that they were from 1968. They were dated August 4, 1968. What was the current day? August 4, 2010. Just sayin'.) From Sandy with HobNobbers, I had received some old hymnal pages through a Valentine swap.
Photobucket

I asked Chester to cut a piece of masonite large enough to cover the holes. Then I glued sections of the newspaper along with pieces of the hymnal pages to it, making a collage. The color of the yellowed newspaper worked great with the colors in the dining chair fabric and also with the wall color in the adjoining living room. Then I covered the edge in lip cord and trim to match the chairs.
Photobucket

Now our new breakfast nook is complete! Well, not really, but if you know me at all you know what I mean.
Photobucket

Problem solved.

Wednesday, June 16, 2010

Is This Beautiful, Or What???

I do a quarterly newsletter for a sewing center in Hurst, Texas, "Richland Sewing Center." The name of the newsletter is "Sassy Stitches."

The owner, Jeannie, sent me some photos today of photos she wanted included in the newsletter for this quarter. This photo was one of them. The quilt won at the Trinity Valley show in Texas and several other shows.

I just had to share it with everyone.

BTW... if she is willing to sell it... I have first dibs!!!!

Photobucket

Saturday, June 5, 2010

Finished?? Almost! Just Needs A Tub!

Although it would be really nice to say this room is finished, complete, done!... we still need the tub. The clawfoot tub has had to be put on a way back burner. It will happen. Just won't be in the near future. So I figured I might as well put the room together as if it weren't going to have a tub.

I did manage to fit in a full size bed. The chair, however, still needs to be upholstered. Can't decide on the fabric. Other than that, it is ready for overnight guests.

Personally, I wouldn't have put the commode in the middle of the wall. But this was already done when I arrived on the scene. Perhaps some sort of screen placed in front? I'll be honest, when in use, you feel as if you are on display.

This is from the doorway. The light from the 2 north windows is very bright and makes it almost impossible to see the window treatments. They are there... just very sheer. 2 of the walls are covered with wood harvested from the ceilings in the old living room. The area above the wood planks, the ceiling and the area around the half circle window is rusted sheet metal from an old barn Chester tore down. No, we are not going to paint it. It's perfect just the way it is.
Photobucket

This wall was the outside of the original farm house, which was built somewhere around the turn of the century. It was uncovered after Chester tore off 2 layers of sheet rock and a layer of the ugliest paneling I have ever seen.
The tin ceiling panel on the wall was rescued from an old building they were remodeling in downtown Ft. Smith. It is in it's original condition. Well, the condition it was in when I got it.
Photobucket

I picked up this wonderful tri-fold Venetian mirror at an antique auction in Ft. Worth.
Photobucket

This is just inside the door, at the end of the bed.
The chair is one of two, plus a settee that I also got from the Ft. Worth auction. They are Egyptian and were in deplorable condition. Looked they had been in a bar fight. Busted arms and what appeared to be blood on the upholstery. Don't even want to know the story behind that. Stripped them of everything, including the straw cushioning (whatever was on the upholstery had soaked through, YUCK!), down to the bare wood and then antiqued them with cream and white.
Photobucket

All it needs (well, besides the tub and upholstery for the chair) is a pillow from C'est Chouette for the bed!